Connecting to a module
In this section you will learn how to connect for the first time to one of our instruments, with minimum background knowledge possible.
Before proceeding, if you did not already, please install the required drivers following the Installation section.
Connecting to a single module
- Requirements:
A Qblox module e.g. a Pulsar QCM or a Pulsar QRM
- A host PC connected to a network adapter with at least one physical Ethernet port. For example:
A laptop (the host PC) with an Ethernet port should be enough to communicate to single module
A USB or Thunderbolt Ethernet adapter
An Ethernet Switch
A router/modem with LAN ports
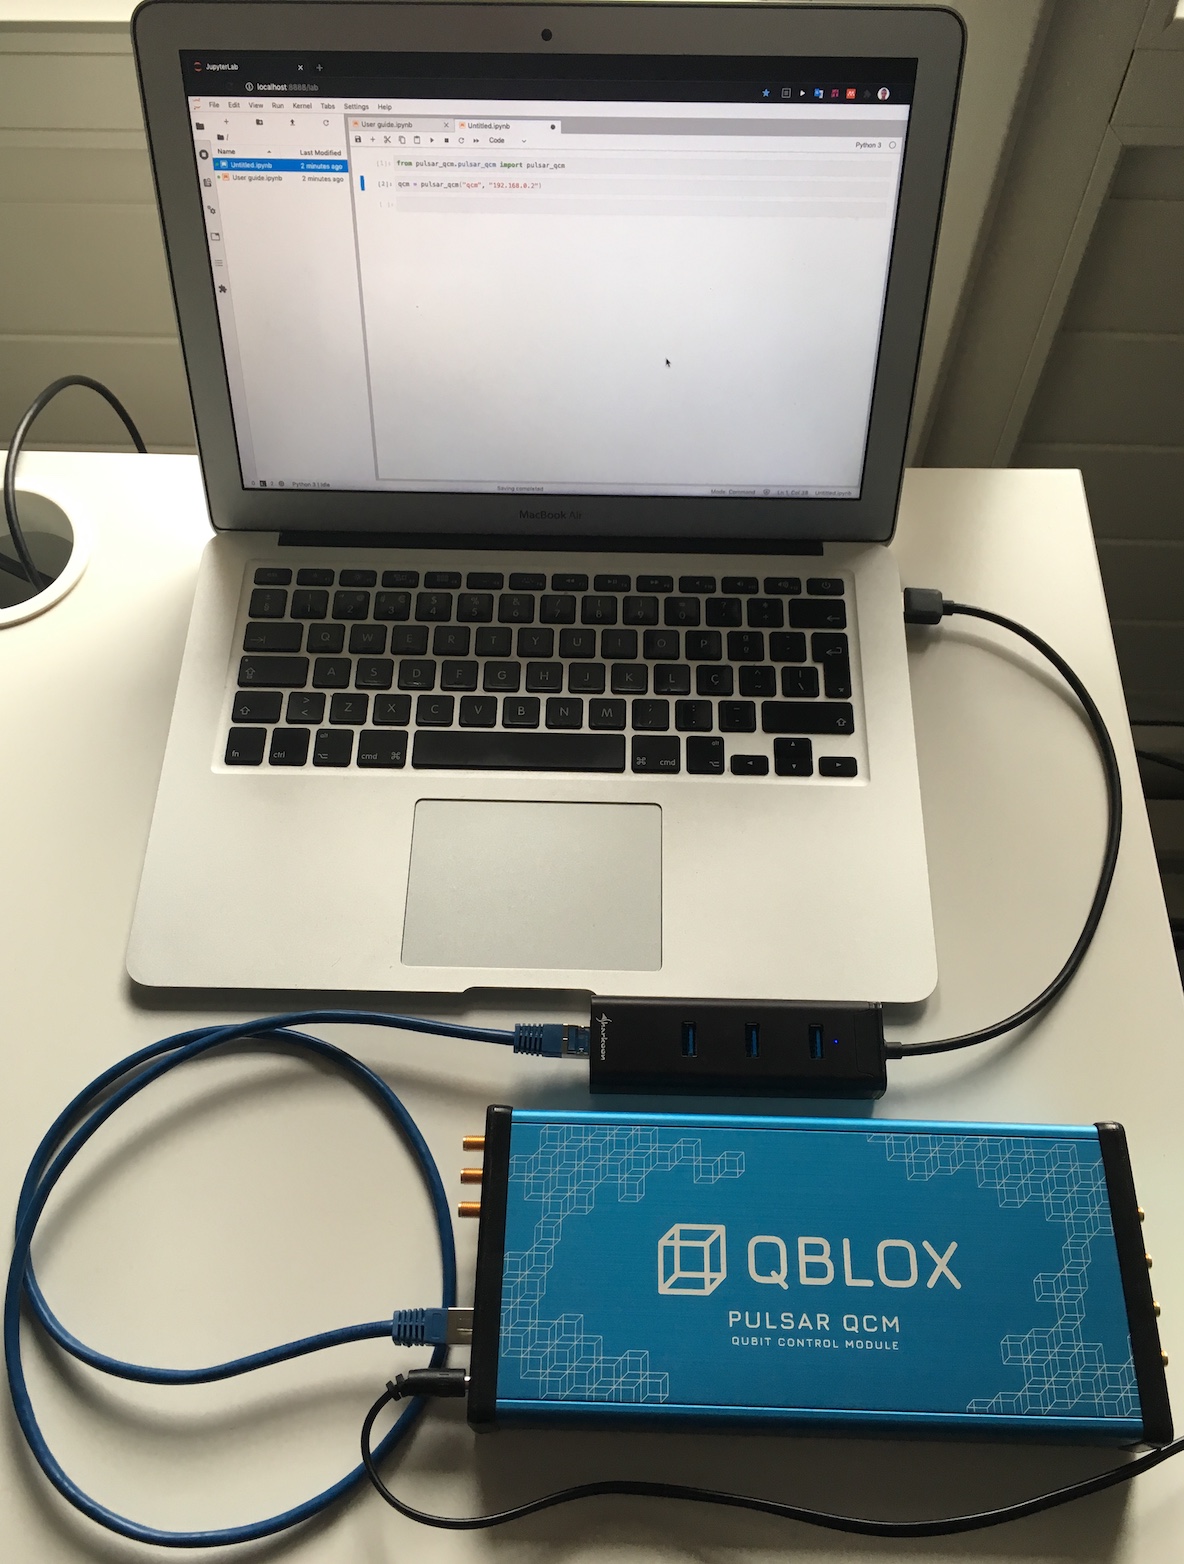
- As an example, we will consider a concrete setup composed of:
A laptop (host PC)
A USB Ethernet adapter
A Qblox Pulsar QCM
The following step should allow you to successfully connect to a Qblox Pulsar QCM module, or a similar one.
Power up the QCM module. The module is ready when all LEDs become green/blue.
Connect the USB Ethernet adapter to your laptop.
Configure the network adapter, in this case the USB Ethernet adapter, such that its IP address shares the subnet
192.168.0.XwhereXis a value between2and255. This configuration might be slightly different depending on your Operating System. See Network adapter configuration for common Operating Systems.Connect the QCM module to the USB Ethernet adapter.
At this point your setup will look similar to:
Tip
After a few seconds, the QCM module should be available on the local network.
You can verify this with:
$ ping 192.168.0.2 # replace 192.168.0.2 accordingly if you have changed it
If successful the expected output is:
PING 192.168.0.2 (192.168.0.2): 56 data bytes
64 bytes from 192.168.0.2: icmp_seq=0 ttl=64 time=0.396 ms
64 bytes from 192.168.0.2: icmp_seq=1 ttl=64 time=0.232 ms
64 bytes from 192.168.0.2: icmp_seq=2 ttl=64 time=0.261 ms
64 bytes from 192.168.0.2: icmp_seq=3 ttl=64 time=0.226 ms
64 bytes from 192.168.0.2: icmp_seq=4 ttl=64 time=0.265 ms
press ctrl + c to stop.
Connect to the QCM module using a Python Interactive Shell or a Jupyter Notebook by running the following snippet (using Python 3.8):
from pulsar_qcm.pulsar_qcm import pulsar_qcm
qcm = pulsar_qcm("qcm", "192.168.0.2")
Note
The 192.168.0.2 is the default IP address of the modules, in case this was changed you must change the code accordingly.
Note
For developers and debugging purposes only,
the driver allows to bypass important hardware/software compatibility checks with pulsar_qcm("qcm", "192.168.0.2", debug=True). Do not use this option unless you have been instructed to do so!
Network adapter configuration
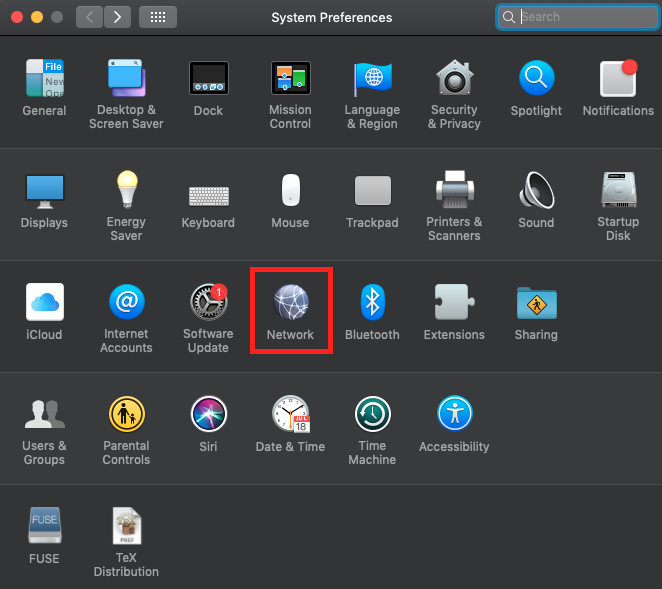
macOS
Open System Preferences > Network and select the adapter that shares the same network as the Qblox module, e.g. (a USB Ethernet adapter)
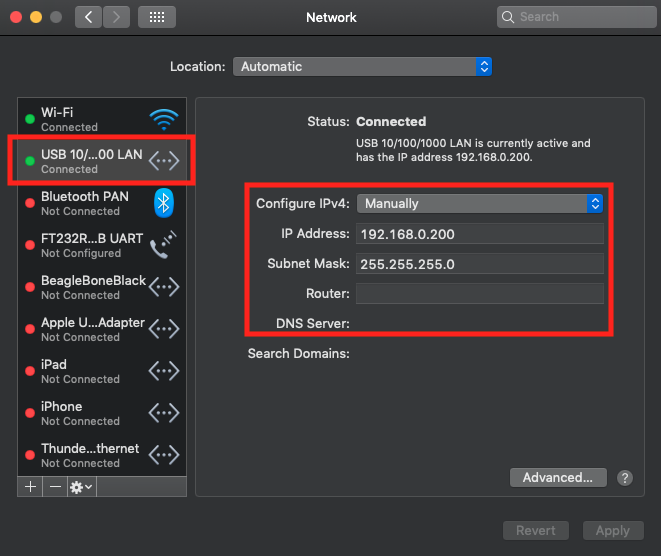
Make sure the IP address has the form
192.168.0.X, for example192.168.0.200. Depending on your setup, you will likely have to set Configure IPv4 toManuallyand specify a fixed IP Address as shown bellow.
Windows
Go to Control Panel > Network and Internet > Network Connections and follow a similar configuration as shown above for macOS.
Ubunto
Go to System Settings > Connections and follow a similar configuration as shown above for macOS.
Closing the device
As a good practice before closing the Jupyter Notebook (or ipython shell) we close the instantiated (QCoDeS) device:
qcm.close()
Connecting to multiple modules
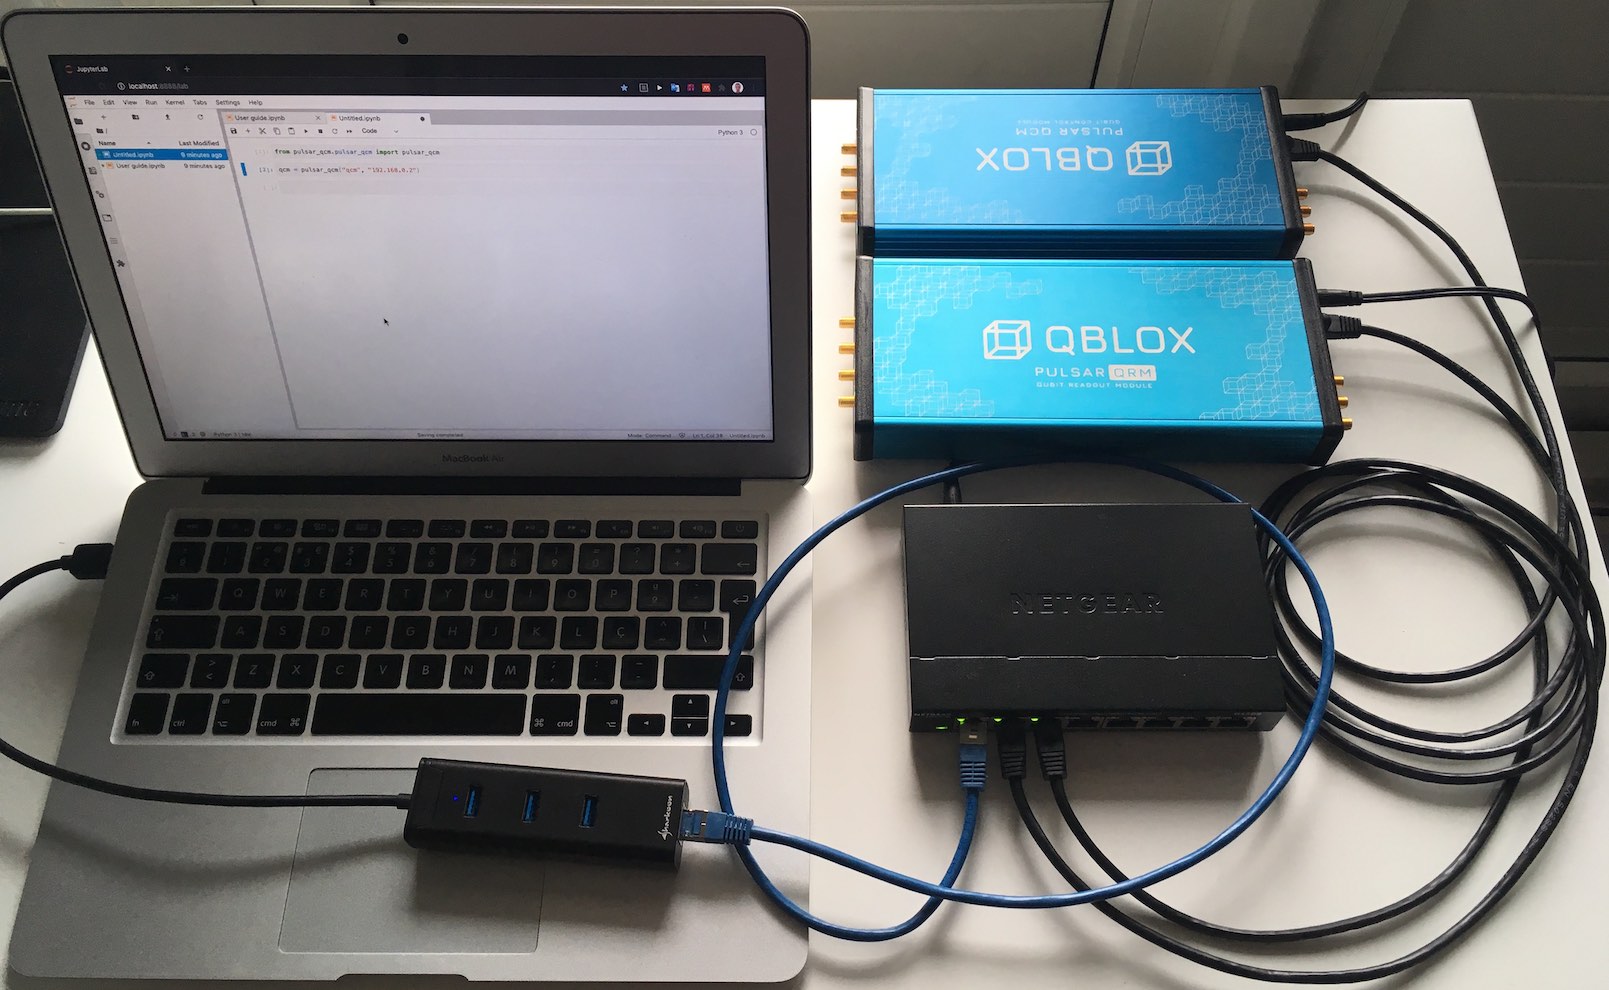
In order to be able to control multiple modules, e.g. one Pulsar QCM and one Pulsar QRM, we need to follow the steps described in Connecting to a single module except, now:
Instead of connecting a module directly to the Ethernet adapter of the host PC, we will connect all the modules and the host PC to the same network using, for example, an Ethernet switch. Note that you still need to configure the network adapter of the host PC as described above.
The IP address of the modules must be changed to avoid IP clashes. See Updating the modules section for instructions.
An exemplary setup is shown bellow:
The python code that allows to connect to these modules will look similar to:
# Import drivers
from pulsar_qcm.pulsar_qcm import pulsar_qcm
from pulsar_qrm.pulsar_qrm import pulsar_qrm

# Instantiate and connect to modules
qcm = pulsar_qcm("qcm", "192.168.0.2")  # This module uses the default IP address
qrm = pulsar_qrm("qrm", "192.168.0.3")  # The default IP address was changed
Note
When employing multiple modules, depending on your experiment, you might need to synchronize them. This is achieved using the SYNC port and distributing the clock reference signal to all modules.
Next steps: Installing Quantify
To get the most out of your Pulsar module, we advise you to install Quantify: our measurement control package with built-in support for the Pulsar modules. You can do this by executing the following commands in a command line terminal:
$ python -m pip install quantify-core
$ python -m pip install quantify-scheduler
Please consult Quantify documentation for more information. We highly recommend following the Quantify tutorials.